
Rebel Fleet Trooper Captain
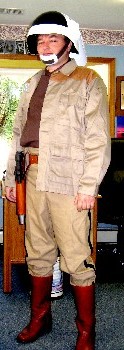
The Author As
Captain Antilles
In January of 2013, one of my twins from pirate reenacting asked me to come with them to Dragoncon in Atlanta. Both twins were originally going, so I decided to think about it. (I have two twins because I am the third twin. If you want to understand that, you need to go read the Pirates in Paradise and Fort Taylor Pyrate Invasion pirate event journals on my pirate surgeon web page. Even after you do, you may still not understand this. I certainly don't.)
My hesitation for doing this was becasue I was busy with my pirate surgeon impression and the web site I do for that. But Jana is a creative pal of mine and she helps me out with my creative projects, so I thought I'd participate in one of hers. She was pursuing the Star Wars track at the event, so I needed to find an appropriate character. I would have chosen a protocol droid if I were able to fit into the armor. Unfortunately, that wasn't going to happen without building something custom because I haven't been skinny enough to pull that off since well before high school.
Since I couldn't be a protocol droid, I decided instead to be C-3PO's first owner and the original victim of Darth Vader: Captain Antilles. As I told Jana in January 2013 when she first proposed going to this event, "I need to have a droid connection and no mask, so I picked Capt. Antilles." (This 'no mask' policy is one I forgot when 2014 rolled around... much to my chagrin. But that's another web page entirely.)
Rebel Fleet Captain Clothing
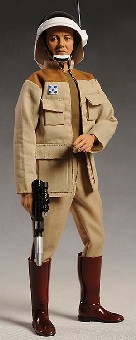
CA Figure
Wanting 3D reference material, the very first thing I did was invest in a Sideshow Collectibles Captain Antilles 1/6 scale figure. I got him off eBay. He proved to be very detailed, as Sideshow Collectibles stuff typically is, and most useful to me in creating the costume.
There were a variety of helpful websites out there for making this costume. The TK560 website was a useful reference, although it focused more on the blue and grey Rebel Fleet Troopers than on Captain Antilles. Studiocreations.net had a very detailed page that provided individual pages for each element of the costume that contained a lot of helpful tips (particularly on making the clothing). Although they also focused on the blue and grey guys, I was able to learn that 1) a BDU shirt was the perfect overcoat for the character and 2) I needed three shirts to make the dark brown shirt - one as the base and the other two to make the flap that covers the front. With that, I was headed in the right direction. Now I needed someone who could sew...
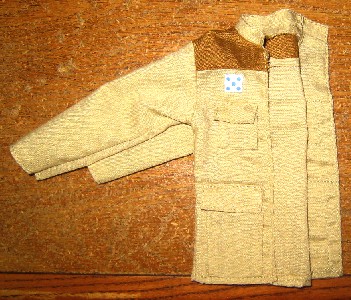
The
Captain Antilles Figure Coat Used as Reference
After quite a bit of wailing and gnashing of teeth, I found a seamstress. (This is not as easy as you might think.) My friend John pointed me in the direction of one of his friends who was a teacher and was creative enough to sew the costume. I gave her the Antilles figure with the shirt and pants as well as the studiocreations web page.
From these things, Kendall made the pants and the dark brown shirt from materials I supplied. She told me she found a civil war riding breeches pattern and modified it to give the pants a slight flare in the hips like the action figure had. (I bought the material so that I could make sure all the colors matched the BDU shirt and figure.)
I got a BDU shirt to serve as the coat and sent it to Jana (the one who had started all this) along with the mocha-colored material for the top of the shirt. I sent her the Antilles figure coat and she sewed that together for me. (I am such an epic failure at sewing that I didn't even ATTEMPT to do any of those things. You must accept your limitations.)
Rebel Fleet Captain Boots and Belt
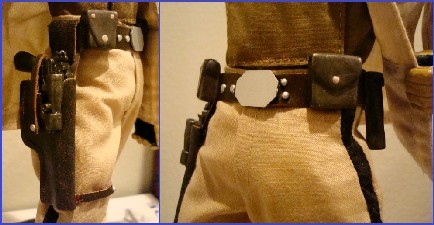
CA Figure Modified Belt and Holster
The leather belt came from my friend Trish at Shananigens in Leather. Trish and I are pals from pirate reenacting and she can make all sorts of cool things out of leather. She knew what kind of belt buckle to get and how to modify it and everything. I just sent her the gun and got it back in a perfectly colored and made holster.
I had originally sent her the images you see here, which is from a modified figure belt and holster, but we decided to keep it simple. I did purchase some belt boxes from TK560 that I'll talk about in a minute to dress the belt up a bit.
The
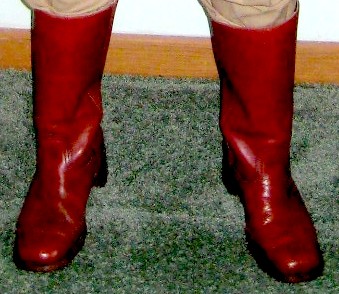
Captain Antilles Frye Boots from eBay
I spent about 5000 hours doing image searches on Google to find boots that looked right. (OK, that's a bit of an exaggeration, but not as much as you might think.) I finally determined the Frye's Campus Boot 14 L in saddle color were as close as I was going to get to being correct. The only trouble with them was the price. So I did something that I have learned you must be very, very, very careful in doing: I bought a used pair off eBay. You see them in the photo at right.
You may notice that they have a fold near the ankles. That fold proved to be my undoing. Jana wanted to walk in the Dragoncon parade in downtown Atlanta with the Star Wars folks. That innocent fold of leather on the boot, which didn't bother me too much when I was test wearing them, turned into an agonizing razor by the end of the parade. When I pulled those boots off, my ankle was bleeding pretty freely due to that fold in the leather.
The
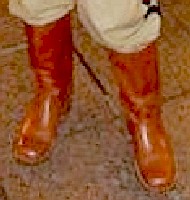
2014 Frye Boots from eBay
Wanting to reuse this costume in 2014, I actually bought a brand new pair of Frye Campus boots on Amazon, only to discover that they were now putting a slightly darker sworling pattern into the leather which didn't look right for the character. Foiled again!
So I sent them back and sculked around eBay until I found a better looking pari of solid-colored Frye Campus boots. I was pretty cautious before buying them, hoping not to repeat my previous mistake. I even had the seller take the boot trees out of them and take photos so I could examine the ankles.
As a result, these proved to be much better boots, although I find the Campus boot is a bit narrow for my foot (and it only seems to come in one width.) Still, no bloodletting occurred as a result of wearing them in 2014 with two separate costumes.
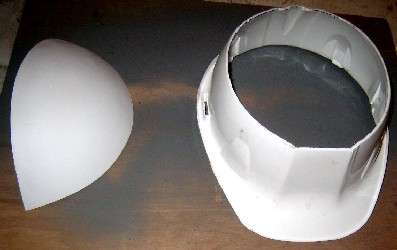
Rebel Fleet Trooper Helmet
This left me with the odd details to create. Odd details are my forte.
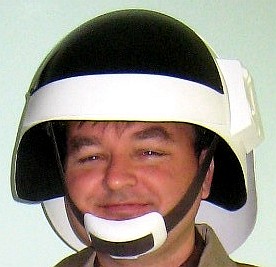
Rebel Fleet Trooper Helmet on the Author
Perhaps the most important piece was the bizarre, gigantic helmet. There were a couple of people out there making vacuformed Rebel Fleet Trooper helmet, so I went that route.
After having some problems getting one from one company, I wound up buying a helmet from TK560's website. They were quick to deliver it and included a color instruction sheet that was most helpful in assembling it. (This page is also where I found the two belt boxes I mentioned previously.)
I could go into detail on how I trimmed, sanded and painted the thing, but the instructions really do give you better guidance than I can on that front. (I will note that I decided to paint it gloss white. I don't remember if the instructions advised this or not, but I was following the model of the action figure's hat. The end result is not particularly shiny even though I painted and sanded and repainted it a couple of times, but I really like the way it came out. Sort of like a semigloss.
Rebel Fleet Trooper Visor and Cut Up Hard Hat Awaiting the
Black Spray Paint
The big trick for the hat as I recall was how to secure it to my head. Somewhere, probably in the instructions from TK560, several methods were suggested to keep the thing on your head including using a hard hat liner. I spent some time searching for the female side of the quick clips used to attach liners to hard hats with the idea of fastening them to the inside of the helmet shell.
Failing to find what I wanted (and not being sure how to keep them in place without drilling into the helmet shell even if I did find them), I decided instead to just modify a cheap hard hat by cutting the top off and then gluing it inside the shell. Once secured, I painted the inside of the shell and the hard helmet black. This worked wonderfully for me and I highly recommend it.
Rebel Fleet Captain Rank Badge
In Star Wars, rank appears to be shown by rectangles and squares. Captain Antilles had a small, medium gray square rank badge with five little light blue raised circles on it. This seemed like something that should be made from plastic, so I contacted a seller on Etsy who made
![]()
Captain Antilles Rank Badge with Straight
Pin, the Paper Pattern and the Wood Square
such things. He said he could do it, but after waiting for weeks, he never came through and eventually begged off. So I contacted a place that made name badges. They quoted me an outrageous price.
Not wanting to pay a lot for what seemed like such a trivial thing, I decided to make it myself out of wood. First I scaled the badge from the 1/6 action figure and then I drew it up in Autocad. I cut a piece of 1/16" thick wood into a square and painted it light gray. I bought a bag of little wood circles at a hobby store, found the correctly sized ones and painted them light blue with acrylic paint.
Next, I cut the Autocad-printed paper pattern out, carefully marking the circle centers and used it to place my wooden circles on the wood square with straight pins as you see in the image. Once I was happy with the arrangement, I carefully ripped the paper pattern apart and removed it and then applied glue to the back of each wooden circle and pushed them into place on the wooden square. I got a bag of adhesive badge pins from the craft store and that was my rank badge. (As a bonus, I now have a lifetime supply of stick on badge pins... if I can find can ever them again.)
Rebel Fleet Trooper Gun
The gun was actually the most challenging part of the costume for me.
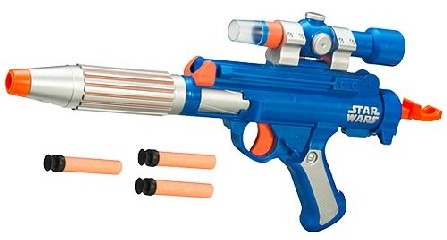
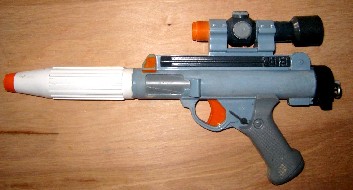
The Rebel Fleet Trooper Gun by Hasbro
I have read in several forums how lucky we Rebel Fleet Trooper cosplayers are to have a Nerf gun available that is soooo close to the real thing. I don't doubt this, but what I can't understand why it can't actually look JUST like the real thing? (But what fun would that be, right?)
My old friend eBay provided me with a Nerf Rebel Fleet Trooper gun. Looking around the web, I found David J. Syczylo's excellent tutorial for modifying the Nerf gun. Well, mostly excellent. In his tutorial, he glibly notes that he "removed all the internal mechanics of the blaster aloong with the light emitter cover." For those who don't know, the light emitter cover is the little clear plastic thing at the end of the telescopic sight. I gingerly fooled around with that thing over a period of weeks, trying every trick I had found on the web. (This thread on the rpf was quite helpful.) I used a heat gun. I boiled it. I tried to pull it right off. Hah! None of these things worked. I finally damaged it after boiling when I got a little to aggresive in trying to remove it.
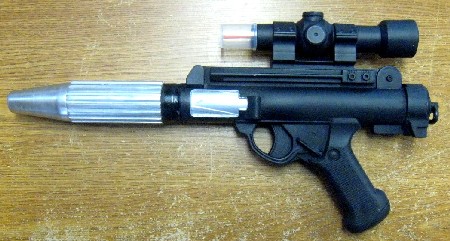
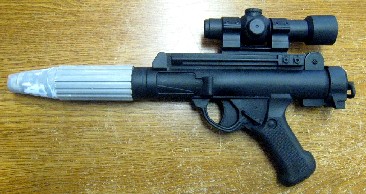
The Finished Rebel Fleet Trooper Gun
So I bought another one! Same problem - it wouldn't come off. Same result, I damaged the clear plastic after boiling. I now had two broken RFT guns and no undamaged light emitter cover. It was time to take a new approach.
I ambled around the aisles at a local hypermart, looking for anything clear, round and tapering. I eventually found just the thing! The clear top on a 4 oz. bottle of Armor All cleaner looked about the same. (In fact, it practically was the same. I didn't glue it on or anything. It fit quite snugly on the end of the sight. Since the blaster spends most of its time in a holster, this works just fine for me.)
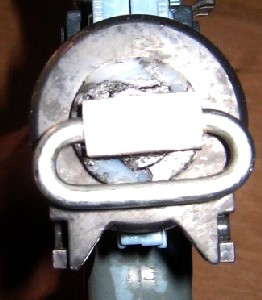
The Plastic and Chain Link on the Back
With that problem solved, I merrily followed David's instructions, sanding off the rough parts, painting it primer gray, sanding again, painting and sanding, removing the raised Star Wars lettering on the handle and fixing various plastic seams that would be easily noticed once it wasn't painted like a carnival toy.
The trickiest bit of modification was replacing the pull handle on the back. Hasbro provides an elaborate plastic ring that projects off the back at a 90 degree angle to the back of the gun that looks ridiculous. I cut that flush, bought a piece of square plastic and drilled a hole in the middle of it that was a slightly larger diameter than the piece of flattened chain link I intended to use. The plastic actually stuck out a bit too far off the back of the gun for my taste, so I used a belt sander to grind the back of the plastic off, making it a bit more rectangular. It worked quite well.
I took loads of photos of painting the gun, so I'm sticking some of them in here for your edification. I should note that I did NOT remove the innards of the gun like David did. Mine still fires Nerf darts. (All you stormtrooper cosplayers out there take note.)
 The Cartoony Hasbro Rebel Fleet Trooper Gun |
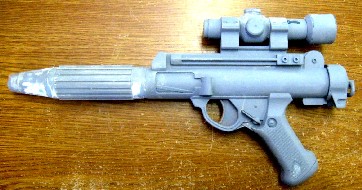 The Primer and Sanded Rebel Fleet Trooper Gun |
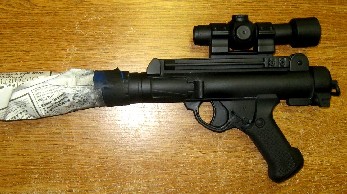 Rebel Fleet Trooper Gun Masked for Black Paint |
 Rebel Fleet Trooper Gun Awaiting Masking & Silver Paint |
This costume turned out pretty good IMO. While we were waiting for the 2013 Dragoncon parade to start, another guy dressed as Antilles came up and invited me to join the Midwest Rebel Legion based on my costume. (Although... two Captain Antilles in the same group? Isn't that like two women showing up to the ball in the same dress?) There was a Vader waiting for the parade to start, so we did the choking scene as you see below.
The only problem with this costume for conventions like Dragoncon is that it just isn't that visually interesting, so if you want attention and people stopping you to take photos, this probably isn't the costume for you.
 Captain Antilles |
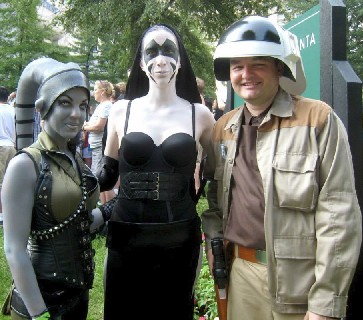 My Friends Jana and Jenn Waiting For the Parade in 2013 |
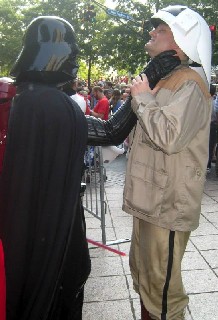 Because It Is Iconic... |