

Scarecrow Haunted House Prop Pages: 1 2 3 <<First
The Scarecrow Prop - Page 3
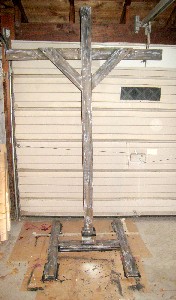
Scarecrow Details - The Stand
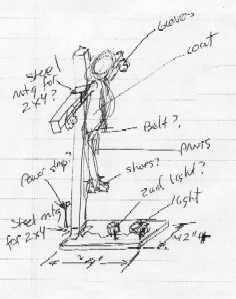
My Sketch of the Stand
We now come to the stand, in my opinion the most difficult part of the
operation. Unfortunately, it's also the least interesting from an artistic
POV, so I won't explain all the trouble I went to to design it so that it
would work properly. Nor will I spend time showing you 3D-style sketches I
made of the stand (like the one at right).
I certainly wouldn't want to bore you with the fact that I got it all together only to discover that the weight of the skeleton without the clothes was too much for the stand to bear, requiring me to tear it apart and re-design it to make it sturdier. Nor do I feel compelled to explain that there were so many screws in the base (which was designed to be separated from the post for easier transport) that the wood started cracking, requiring additional bracing.
No, I'll just skip all that and show you photos of the painting, which is easily comprehended with a few photos. I used terrycloth rags and swabbed latex paint on it to give it a "weathered" look. I started with a coat of black (below center left), added a coat of "medium" brown (below center right), finishing with light gray (below right)
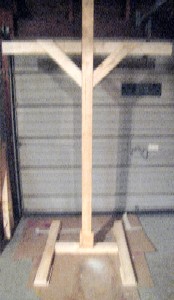 The Unpainted Stand |
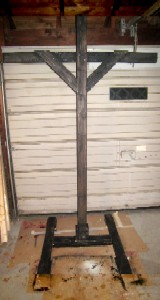 Stand Painted Black |
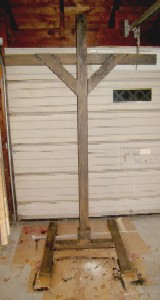 Stand Swabbed With Brown |
 Stand Highlighted with Gray |
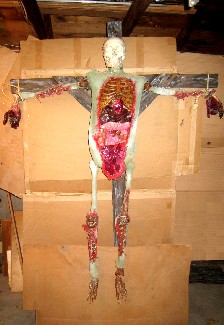
Scarecrow Details - Wound Application
Opened Front
The next step was to create the wounds on the scarecrow. Since I
had gone to all that trouble to create leaf organs, his front naturally
needed to be open. (This prop will quickly begin to remind you of the
guard that Hannibal Lector eviscerated in Silence of the Lambs, which is
probably no accident since I
made that prop over a decade ago for a Haunted House. What can I say?
The pose is quite evocative, not to mention scarecrow-esque.)
So the first job of this phase was to open the abdominal cavity, which I did with an X-acto knife (giving the burlap a nice jagged edge). I then painted it with Modge Podge to stiffen the material. I propped the flap up with a little wood thing I constructed just for that purpose. My goal was to make the flap of skin poke out, which is more horrifying than having it just lay there flat against the body.
Once it was dry, I applied a coat of very dark red. (Below left.) I think that paint was called Red Spice - which is very different from Old Spice.) I also added wounds in the extremities. I proceeded to cut them open at the joints (where it looked to coolest), covering the "wood" skeletal parts so's not to ruin the effect. I then painted the inside of the burlap there with Red Spice. Once dry, I daubed on a bright cherry red in places to make the wounds look fresh. (Below center.) Then I uncovered everything and added string stitching to the wounds to match the mask (below right - see also photos at bottom of the page).
 Chest Opened & Painted Red Spice |
 Limbs Opened & Painted Red Spice |
 Paint Protective Coverings Removed |
Scarecrow Details - Clothing
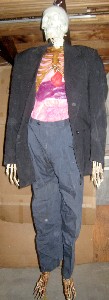
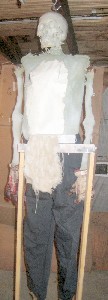
Sure Looks Bloated
That left the clothing. For the record, skeletons do not wear clothing
very well (see the absurd photo at right. (I think he is
bloated.)). Of course, this may
be due to the fact that it would probably require someone with actual skills at sewing to fit formal wear to something with a waistline that could be
measured in single digits...but I digress.
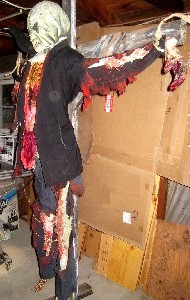
I had once seen a drawing of a really evil-looking scarecrow wearing a black suit, so I chose to put mine in a black suit. A trip to the thrift store failed to provide such. I recalled that I had an old suit-coat and (possibly) a pair of pants that I had been using as padding for some other props. I hoped they were black...and the coat was. Unfortunately, that pants were not.
After inserting the organs to give him form, I put the clothes on him. You've already seen what that looked like. I knew some extra work (by which I mean hacking and slashing) on the clothes would be required. This fit the motif anyhow, so onward I went.
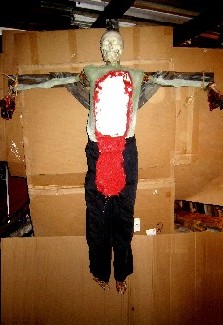
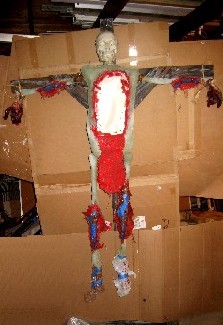
Since I had created the wounds already, the trick was to line the tears up with them. (I figured I may as well showcase all that work. Sewing those things back shut was not my idea of fun, even if I liked the result.) I drew lines on the cardboard once the skeleton was mounted and then used scissors to make the broad cuts and and Xacto Knife to produce shredded clothing tears. You can see the results in the photos below, both without the mask (left) and with it (center and right.
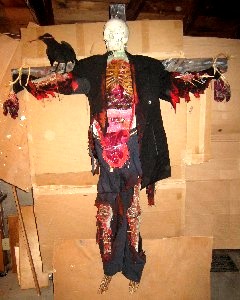 Scarecrow in Ripped Open Clothes |
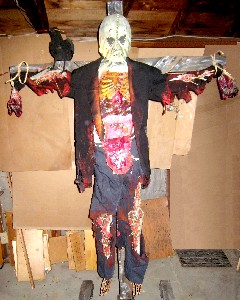 Completed Prop - Front View |
 Inside Bucky |
Scarecrow Details - Close Up Images
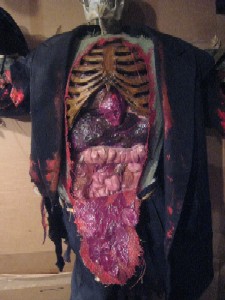
The Chest Cavity Without a Flash
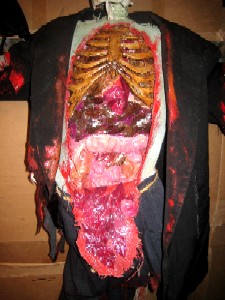
The Chest Cavity With a Flash
Now I realize that you have seen lots of pictures of the chest cavity, but
I thought I'd give you some more, a bit closer to the prop.
At left we have it as it would appear to the naked eye if the naked eye flattened the heck out of everything the way a camera does.
At right we see it as it would appear if you had a flash mounted right in the middle of your forehead. (Which would be something. Think of how you could temporarily blind your friends at a campfire or in a haunted house using it.) The leaf effect is still kind of hard to discern here, but by now you either get that or you don't.
There is actually quite a bit of detail in the arms and legs, as I have hinted. I certainly wouldn't want you to miss out on that, so here you go (below). The arms and legs are all painted like wood (as you've seen) which I went way out of my way to preserve, even though, if whatever happened to this poor guy had really happened, they would be splattered with "blood." Then I sewed them loosely shut with white twine, which basically obscured all that hard work painting them to look like wood. Oh well. I bloodied the whole thing up with dark red (like dried blood). This looked sort of lame, so I added bright red blood, which, in the real world, would not look this way unless he had been freshly opened. (What can I say? Sometimes you have to cater to what the public expects.)
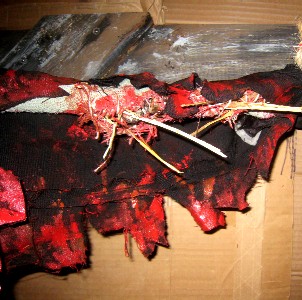
Thinking further on the whole thing, it occurred to me that it would be cool to add a crow to the scarecrow, and then said crow would be holding a piece of straw that he had plucked from the thing. So that meant jamming some straw in there (painted with blood, although this is almost impossible to see). Putting his clothes on him, I realized that they should be bloody as well and you can kind of see how this went. I do think the crow is a nice touch, though. Below we have (from left) his right arm with crow, his left arm and his legs.
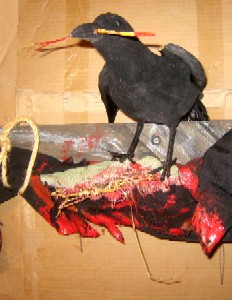 The Crow and the Right Arm Detail |
 The Left Arm (of the Scarecrow) Detail |
 Scarecrow Prop Legs |
With that the body was essentially finished. It was time to move on to the details.