

Brain Gremlin Model Pages: 1 2 3 Next>>
The Brain Gremlin Model, Page 2
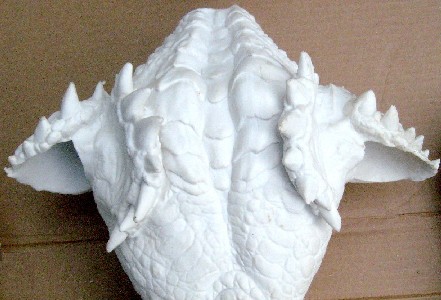
The Two Rows of Spikes on the Mohawk Model's Back That Had to Be Removed
True to his name, Mohawk had a huge mohawk of spikes running along his head and down his back. Fortunately the spikes on his head were separate pieces and could be left out of the model. Unfortunately, the spikes theme was repeated throughout the sculpt and appeared on his shoulders, arms and particularly on his back. (Lots of spikes were needed, presumably to communicate to the movie audience that this was one bad gremlin. I would say he was the evil leader of the gremlins, but the gremlins are pretty chaotic in nature and didn't really seem to have a leader.)
At any rate, work needed to be done to remove the spikes on his back and then fill in the holes left by that work.
 Removing One of the Sets of Spikes on The Model's Back |
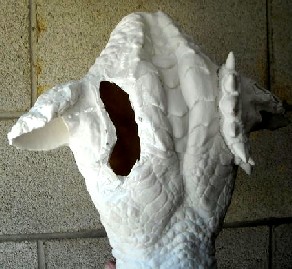
 Dan's Resculpting of the Holes Left Behind |
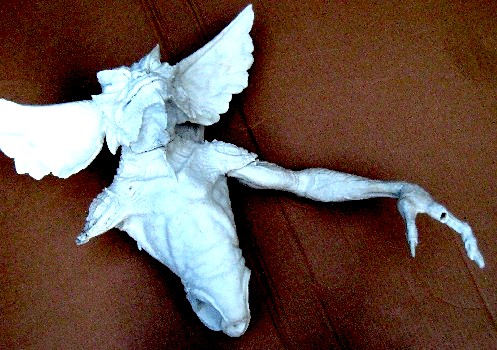
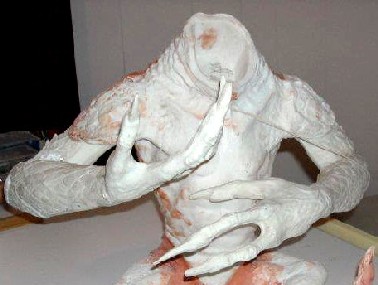
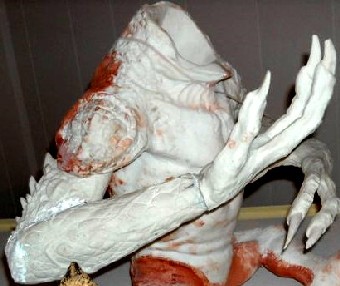
The Mohawk Model With the Head and Left Arm in Place. The Right Arm was Posed Similarly.
The arms needed quite a bit of work. In addition to having some extra spikes on them (particularly at the shoulders), the Mohawk arms were built so that they would stick pretty much straight out at the sides and slightly in front of the model. I can only guess that this was so that the model was balanced when it stood, because it looked unnatural to me.
The pose I wanted for this model was the iconic Brain Gremlin seated, holding a pipe up to his mouth in his right hand. The other hand didn't concern me as much, so I let Dan decide how to post it... after fixing the finger that had gotten broken (as you will notice in the above photo). In order to get the hand positioned properly, Dan had to remove the right hand from the arm and modify the position of the fingers so that it would hold the pipe (as much as it could hold the pipe).
I found an appropriate pipe on eBay (they're surprisingly affordable) and sent it to Dan so that he could model the fingers around it. (This makes this process sound somewhat effortless. Truth be told, I spent hours scouring eBay and comparing the images of pipes I found there with the one seen in the movie to make sure I was as close as possible to the original.)
You can see the pipe in Dan's photos of the repositioned hand holding it below.
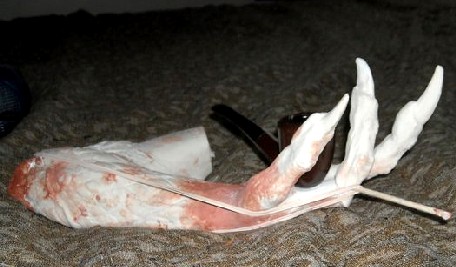 The Resculpted Right Hand Holding the Pipe With Support Bands |
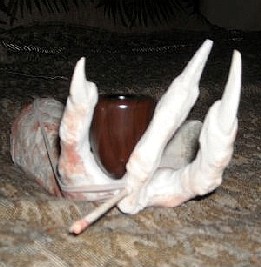 The Resculpted Hand and Pipe Front |
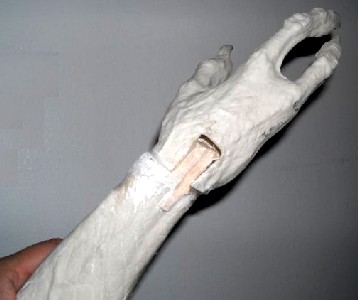
The Repositioned Wrist With Wood Block Holding the Hand
The arms were designed to fit into the shoulder sockets in one position as seen in a previous photo. This meant that both arms required rework since I wanted him seated. He couldn't sit with his arms sticking straight out from his sides. The right arm obviously had to be aligned in such a way that it could cradle the bowl of pipe when the stem was in the Brain Gremlin's mouth.
Dan also had to change the position of the hand relative to the arm once the bend in the elbow of the Brain Gremlin model was added. Dan cut a notch into the hand and then added a wood block to lock the hand into place. This all must have taken quite a bit of experimenting, planning and forethought to set the position properly.
Dan decided to fold the empty-handed left arm across the gremlin's midriff as seen in the photo from the baseball card which I gave Dan as a reference. (See the first page of this article.) This primarily required repositioning the elbow so that the left arm could fold across the body in a manner similar to the picture.
 Resculpted Arms From the Front. (Note the Cord Holding the Arm.) |
 The Resculpted Arms From the Right Side |
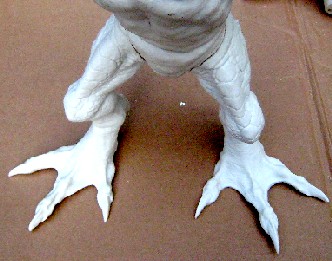
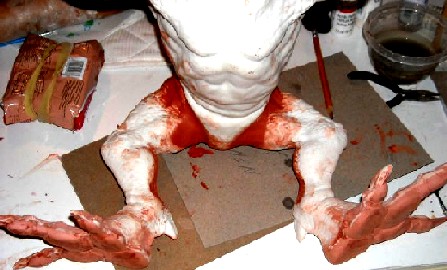
The legs also required quite a bit of rework. You can see what Dan started with below.
 Mohawk Resin Model Legs on the Torso |
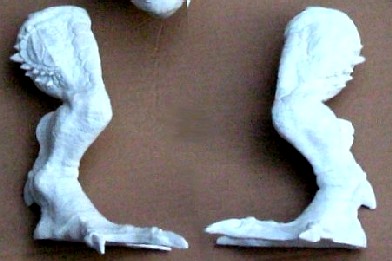 Mohawk Resin Model Legs from the Side |
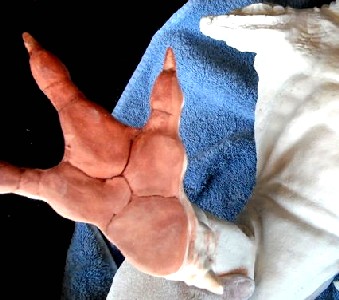
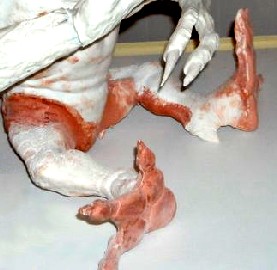
The Resculpted Right Footpad of the Brain Gremlin
Several things needed to be changed. The major operation was to modify the legs so that the gremlin would be in a sitting position, like the Brain Gremlin was when he gave his lecture. This required modifying the connection of the legs to the torso and flattening out some of the parts on the back of each leg so that it would be flat in the places where it came in contact with the seat.
Related to modifying the legs to sit flat was removing the fins that had been added to the back of them for the Mohawk gremlin. (These can be seen in the lower parts of the legs in the picture above right. The Brain Gremlin didn't have these fins.
The final modification to the legs was adding foot pads to the bottom of the feet. Because the Mohawk model was meant to stand, the bottoms of his feet were flat, with no pads. (Why should they add something no one would see?) So Dan had to add them to the feet because they would be clearly visible on a seated Brain Gremlin.
 Resculpting the Legs, Angled |
 Resculpting - Note the work to Remove the Fins From the Calves |
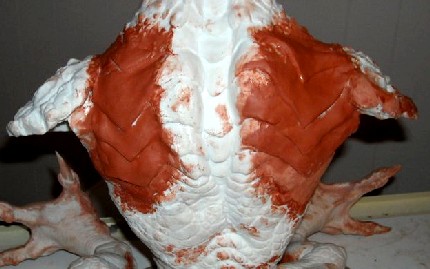
Once the gremlin was assembled, Dan brush-painted the model. He used the NECA action figure as the primary model for the paint scheme. I provided several screen-captured images from the DVD to guide the painting of the parts of the Brain Gremlin that couldn't be seen on the action figure. Below are some photos of Dan's paint job on the model.
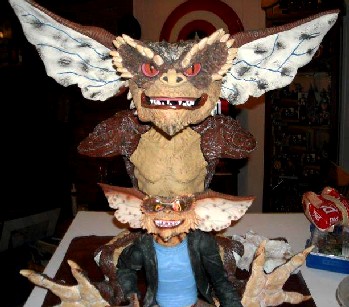 Dan's Paint Job on the Brain Gremlin With the Figure Front |
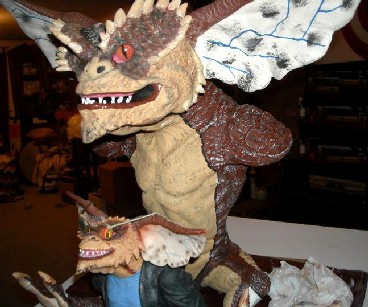 Dan's Paint Job on the Brain Gremlin With the Figure Angled |
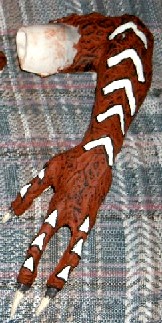 Dan's Painting of the Left Arm |
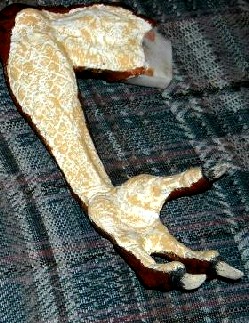 Dan's Painting of the Left Arm, Underside |
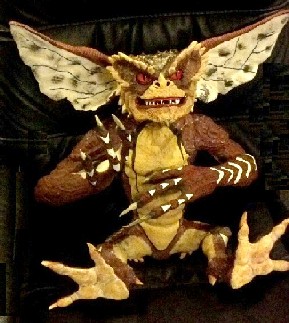 The Final Paint Job of the Brain Gremlin by Dan |