

Skeleton Garden Menu: Main Skeletons Skeleton Garden Skeleton Flowers Skeleton Tree
The Skeleton Garden Flowers
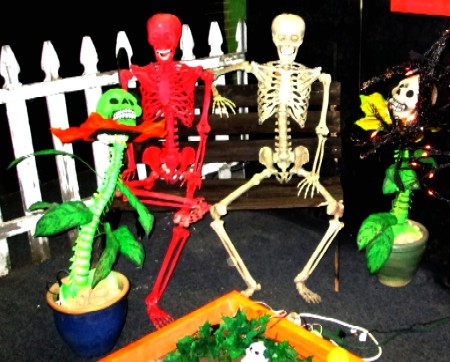
Two of the Skeleton Flowers Surround the Bench Skeletons
In the It's a Skull World version of this room, the singing Skeleton Flowers were intended to be the focal point of the room as I explained on the room page. Since that didn't happen, I switched gears and decided to use some light up gummi skulls as the heads to the flowers instead. These were originally intended to be placed around the room in the It's a Skull World haunt. Now they were going to get a starring role.
Well, sort of. While they had always been the most important part of the original concept, they wound up taking a back seat in the room itself. This isn't to say they didn't add anything, it's just that there was so much going on in this room that they were just one more skeletal element. It probably didn't help that I kept coming up with new ideas for skeleton garden things once I saw the space I had to work with. Still, this room would probably have never happened without them, so I can't complain.
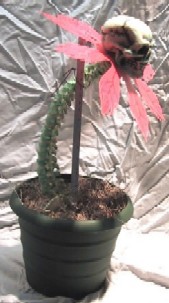
The Prototype Skeleton Flower

Doesn't He Look Like
He's About to Sing
a Rock Ballad?
When I first came up with this concept in 2006, I put together a prototype of what I wanted to see how it looked. I had purchased a slew of little foam skulls for the Skull World concept, so I started with one of those. A miniature skeleton spine came from eBay and the petal was cut out of red-orange cardboard.
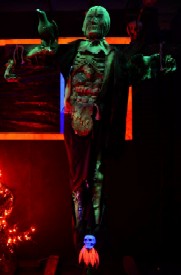
Photo: Delan Robbins
The Proto-Skeleton Flower in
Front of the Scarecrow.
Back then I had intended to make them all out of cardboard. The cardboard proved to be too flimsy. To stiffen the cardboard, I encased it in clear contact paper. This helped, but over time the petals drooped, suggesting it was still not stiff enough. (I should have taped wires to the bottom and then applied the contact paper.)
The larger problem was the spine. You will notice in the prototype photos (with the light background) that there is a piece of aluminum angled shoved into the pot to which I have tied the backbone. These backbones were made to be hung, not to stand on their own. This was actually a good lesson because I knew when I went to make the actual flowers I was going to have to address this.
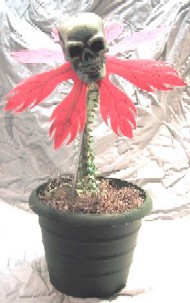
The prototype flower actually sat on my workbench for the next 6 years, a constant reminder that some day I would have to do this room. When I finally committed to it in 2012, I knew he had to be a part of it. The original paint had faded badly, so I pulled the thing all apart and repainted it. I had planned to replace the drooping flower petals, but they turned out to look quite good in the black light, so I just kept them.
 Proto Skeleton Flower Right |
 Prototype Skeleton Flower Front |
 Proto Skeleton Flower Left |
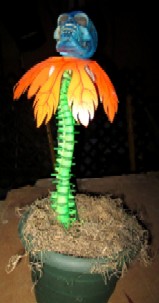 Repainted Proto Flower |
Constructing the Large Skeleton Flowers - Petals
The first step of creating the large flowers was to make the petals of the flower. Having given up on using cardboard, I planned to make a mold and cast them so I could get the right look. The whole concept at work in this room is that it is so bright and cheerful and yet still sort of creepy in that Willa Wonka's chocolate factory way. (Except more so.) I wanted the petals to have jagged ends and prominent veins in the leaves. I started researching this in late 2012, book marking websites and making plans for all the work I would do next summer.
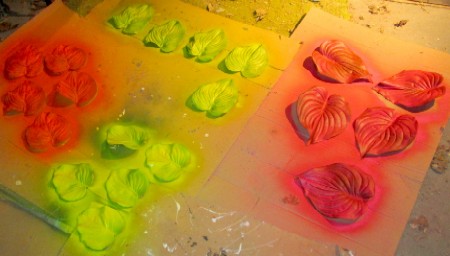
The Hosta Leaves Spray-Painted with Black Light Paint
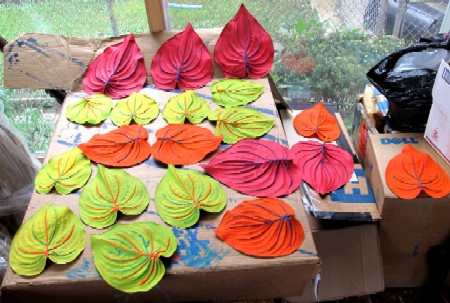
Unfortunately next summer got filled with working on my articles for my historic pirate surgeon website and creating the rebel fleet trooper costume for Dragoncon. By the time I settled down to work on the Skeleton Garden, I was looking at four weeks. Clearly not enough time to fool around with learning to mold your own flower petals. So I went to Michaels and perused the artificial plants. There I found that savior of my real garden in fake form: hostas. The fake hostas had wonderfully veiny protrusions on the leaf and were pointed at the ends. Not quite jagged, but I liked them anyhow.
I cut the leaves off the plants, sorting them into three sizes. I figured to use five petals on each flower, so I needed five of each size. Two fake hosta plants gave me what I required.
The Hosta Leaf Veins Highlighted in Red and Blue
The process of painting them proved to be fairly simple. I just got several cans of black-light sensitive spray paint and gave each set of five a thorough coating in a single color. I actually gave them several thorough coatings because the hosta leaves were very dark green. I later installed a black light in the garage to test different props with. I probably could have spared some spray paint - I wasn't thinking about how the black light would eliminate the non-iridescent colors to disappear.
Because these were intended to be a central feature of the room, I decided to hand paint the veins on the flowers in red and blue (like veins). It's a detail that will be lost on 90% of the people going through the haunted house room, but it made me happy.
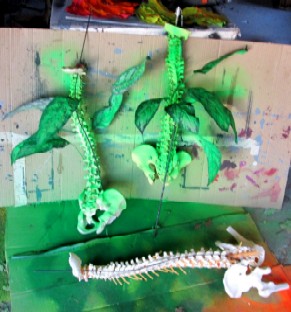
Constructing the Large Skeleton Flowers - Stems
Next up were the stems of the flowers. Taking what I had learned from the prototype, I acquired some small pieces of round steel rod. These I bent into various shapes to give the stems/spines a twisted look. Since the petals being different sizes, I thought it would further differentiate one stem from another if I twisted them in individual ways.
I also had a bunch of really cheap plastic plants that I cut apart so that I could use them as leaves on the stem. These were wired onto the spine just like the steel rod. Then the whole mess was liberally coated in fluorescent green spray paint. While that dried, I cut little wooden bases for the gummi skulls that would serve as heads. Holes were drilled into this to accommodate the steel rod in the spine of the backbones as well as to allow plug for the gummi skulls to be fed through. Then I painted them black and screwed them onto the partial skull bases on the spines. Easy peasy.
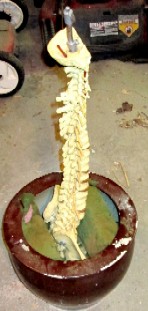 Unpainted Spine Stem |
 Two Wired, Leaved and Painted Spine Stems |
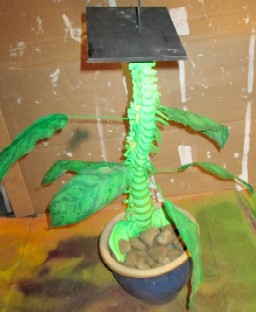 Spine Stem in Pot With Wooden Flower Base |
The final step was mounting the gummy skulls, which was done with drywall screws through the wooden base. I had originally intended to turn the lights on inside the skulls, so I painted their white power cords black. I went to a great deal of trouble to make sure to preserve the wiring, carefully feeding it down the spine stems in the most inconspicuous way and zip-tying the cord to the spine. However, a test of this in my garage proved that the gummi material glowed in a really interesting way. The light actually dampened this effect, so I just left them unplugged.
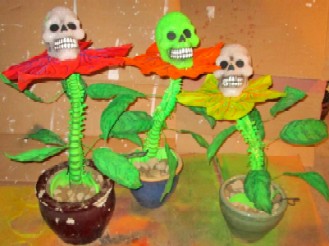 The Finished Skeleton Flowers in Their Pots |
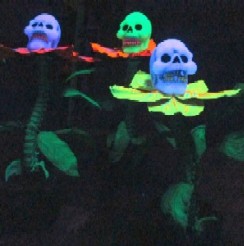 Black Lit Skeleton Flowers |
 The Red Skele-Flower |